
How to use OPEQ
OPEQ looks complicated, but it's actually very simple. It works like any wallet you know: an address to receive, a Send button, swaps and tokens. There is only one new idea, and it's worth two minutes before you start.
The one thing to know: two keys
Every network charges a small fee for each transaction, and that fee must be paid by a normal key: an Ed25519 key on Solana, the same kind Phantom uses. A quantum-resistant wallet cannot pay that fee by itself. So OPEQ gives you two keys, both made from your 24 words:
YOUR OPEQ WALLET
Holds your funds
Quantum-resistant. It has no private key at all: it only moves when the program checks your hash-based, one-time signature.
keep your SOL and tokens here
FEE KEY
Pays the network fee
A normal Ed25519 key, like Phantom's. It pays about 0.000005 SOL per transaction and has no power over your wallet.
holds only about 0.005 SOL
When you send from OPEQ, your wallet signs what happens to your funds, and the fee key only pays the fee. If someone ever broke the fee key, they would get the few cents on it and nothing else. You never have to manage it: your wallet tops it up by itself when it runs low.
On EVM networks it is the same idea: your OPEQ account holds the funds, and a small gas key pays the gas.
Install
Chrome
Install OPEQ Wallet from the Chrome Web Store. It opens from the toolbar or in a full tab.
USB drive (Windows)
- Download OPEQ-USB.zip, right-click it and choose Extract All.
- Copy the OPEQ-USB folder to your USB drive.
- Double-click OPEQ on the drive. It checks its own files and opens in its own window. Your wallet lives on the drive, not on the computer.
Create a wallet
- Plug in a new wallet. On the start screen, choose to create a new wallet.
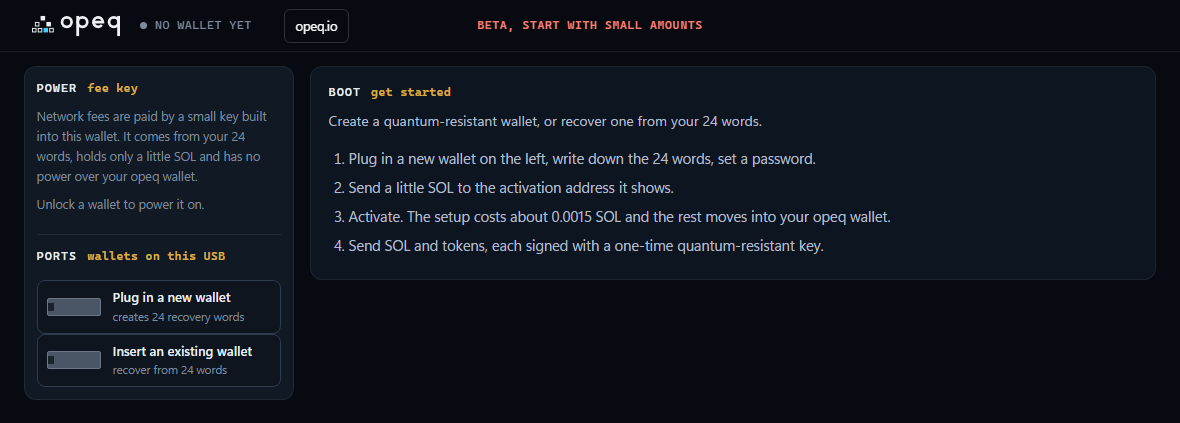
- Choose a password of at least 10 characters. It unlocks the wallet on this device only.
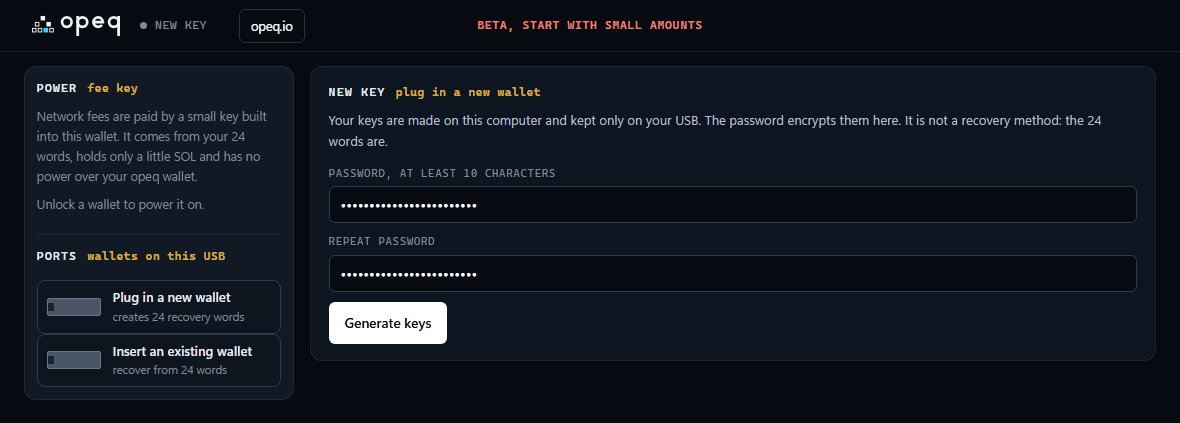
- Write the 24 words on paper, in order. They are your only backup. Never take a photo of them and never type them into a website. (This picture shows placeholders, never real words.)
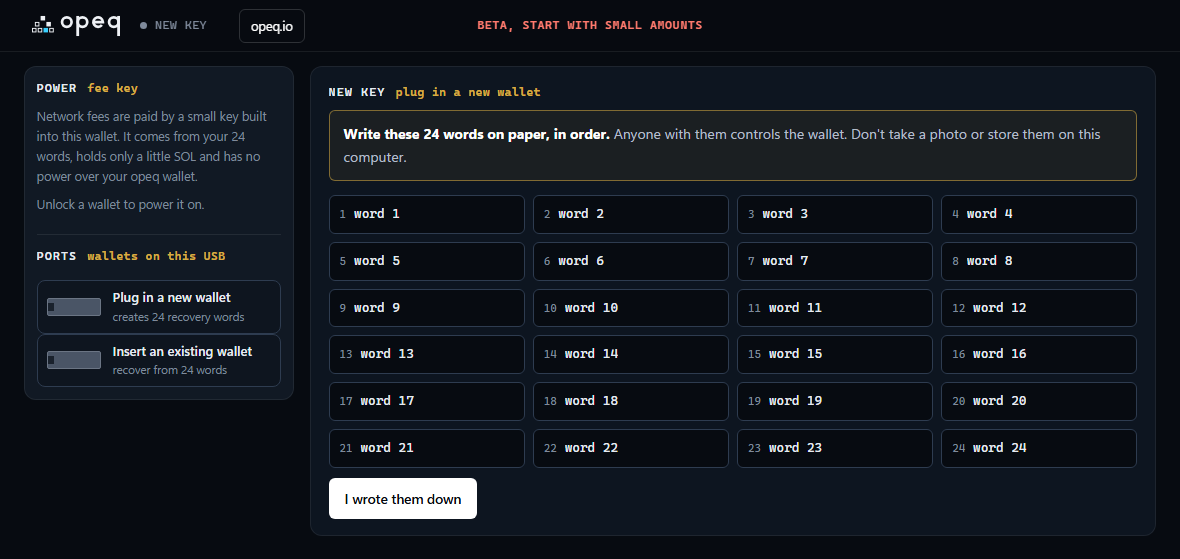
- Confirm three of the words. This makes sure your paper copy is right.
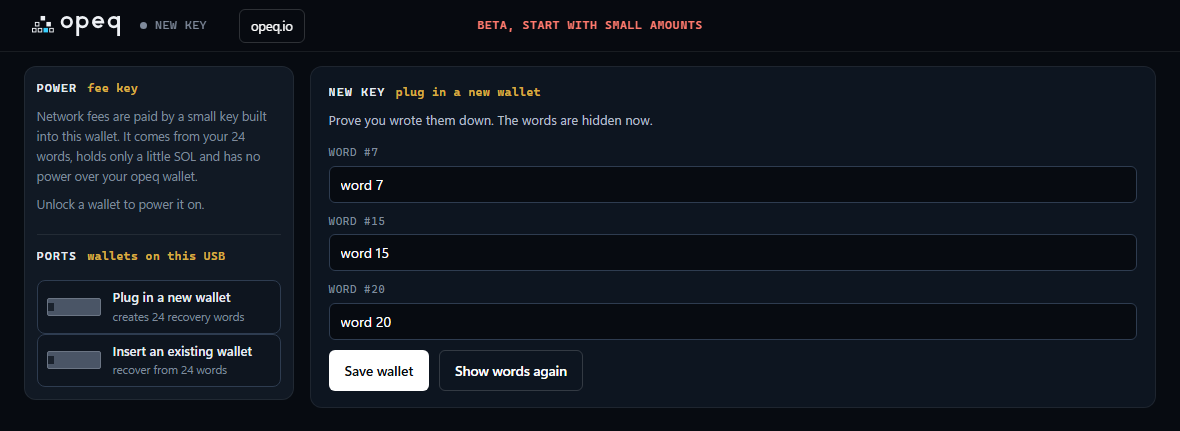
Activate on Solana
A new wallet must be activated once. The activation address shown here is your fee key. Look at the left panel: it is the same address.
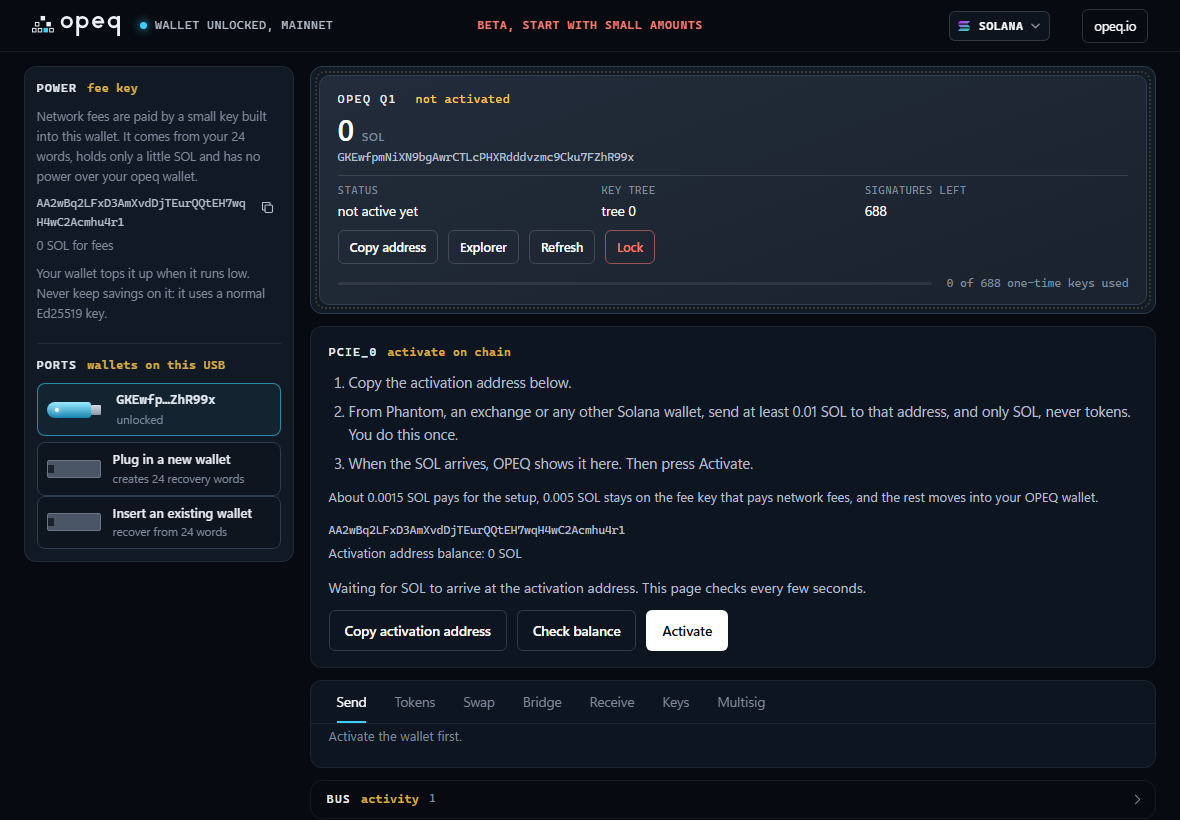
- Copy the activation address and send at least 0.01 SOL to it from Phantom, an exchange or any other Solana wallet. Send SOL only, never tokens.
- Wait a few seconds. The page checks the balance and tells you when the SOL arrived.
- Press Activate. About 0.0015 SOL pays the setup, 0.005 SOL stays on the fee key for future fees, and the rest moves into your OPEQ wallet.
After activation, send your funds to your OPEQ wallet address (the big one at the top), not to the fee key. The fee key is only for fees.
Receive
Your OPEQ wallet address is at the top of the wallet, with a Copy address button, and in the Receive tab. It is a normal Solana address: send SOL or any token to it from anywhere. The address never changes.
Send
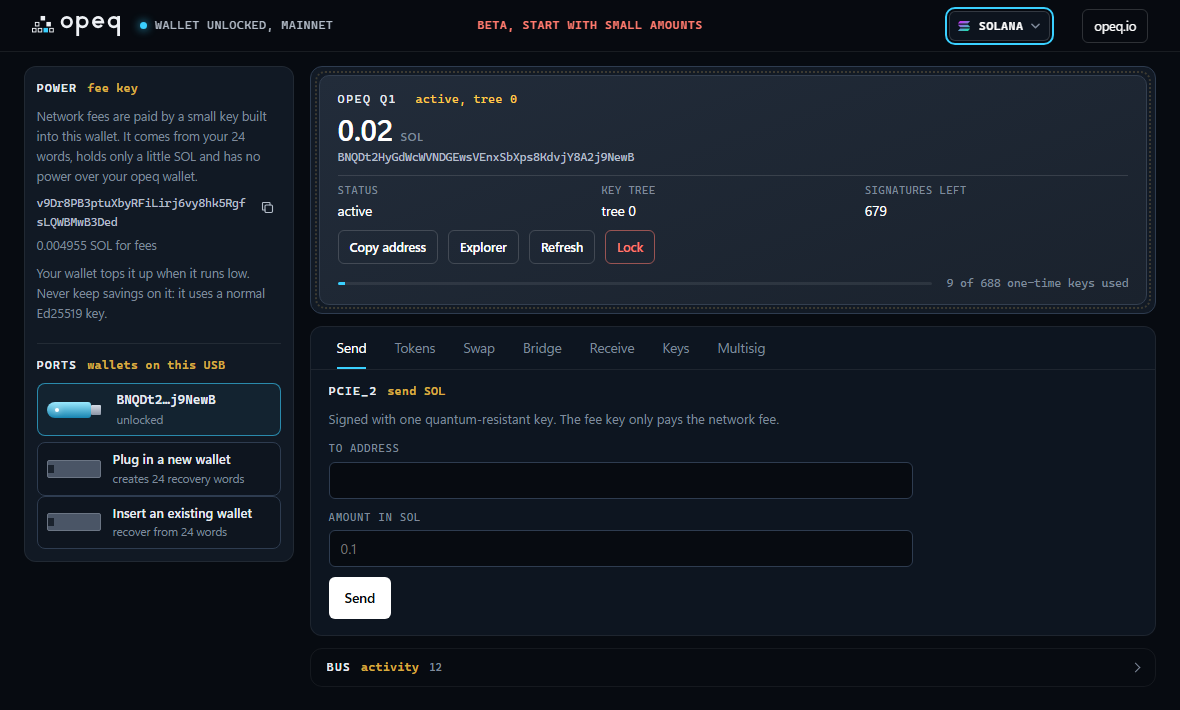
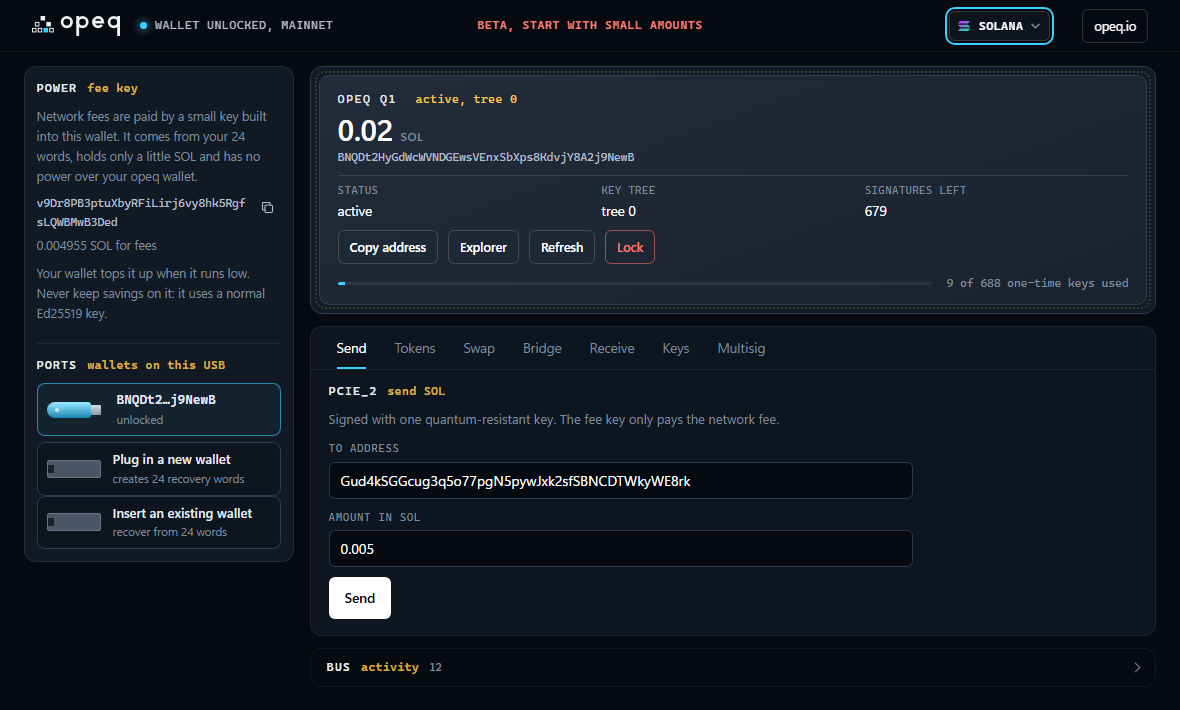
- Open the Send tab, paste the address and enter the amount.
- Press Send. A window shows exactly what will happen: amount, receiver, network fee. Read it, then confirm.
- The wallet signs with one quantum-resistant one-time key. The fee key pays the fee.
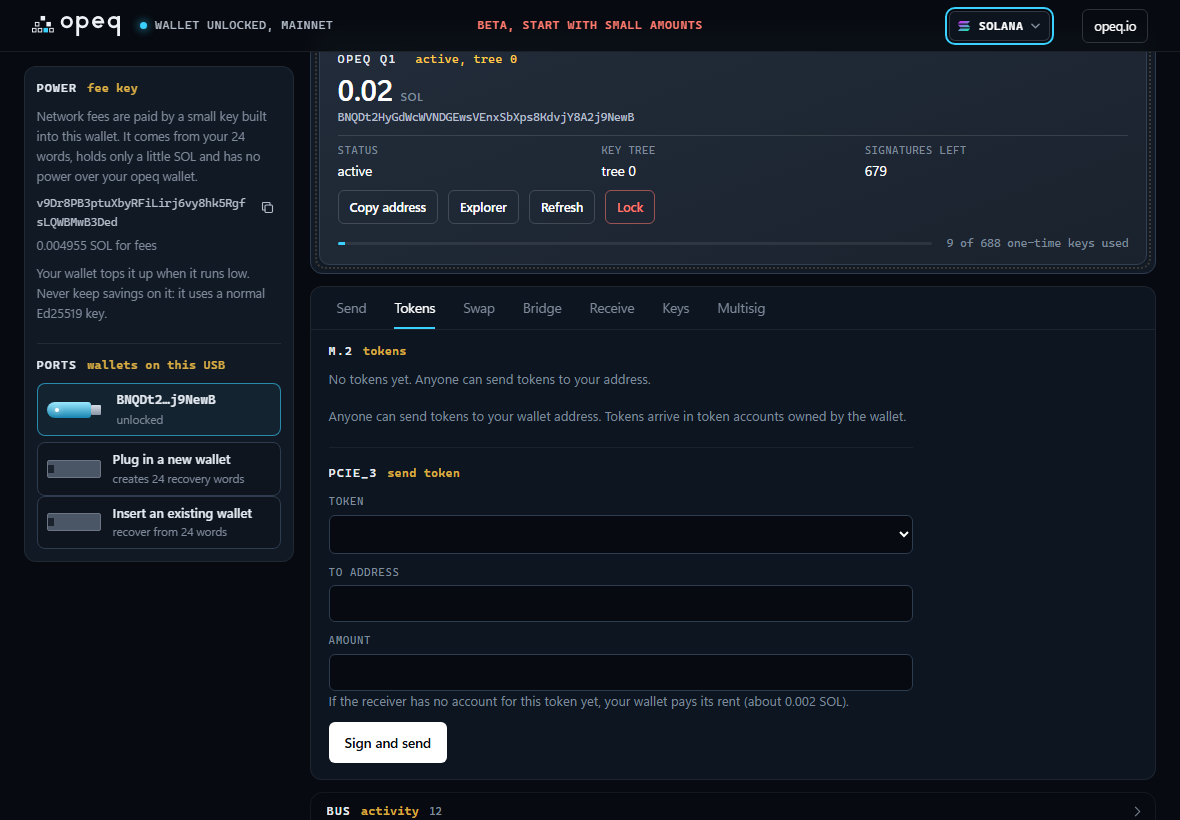
Tokens are in the Tokens tab: pick the token, paste the address, enter the amount.
Swap
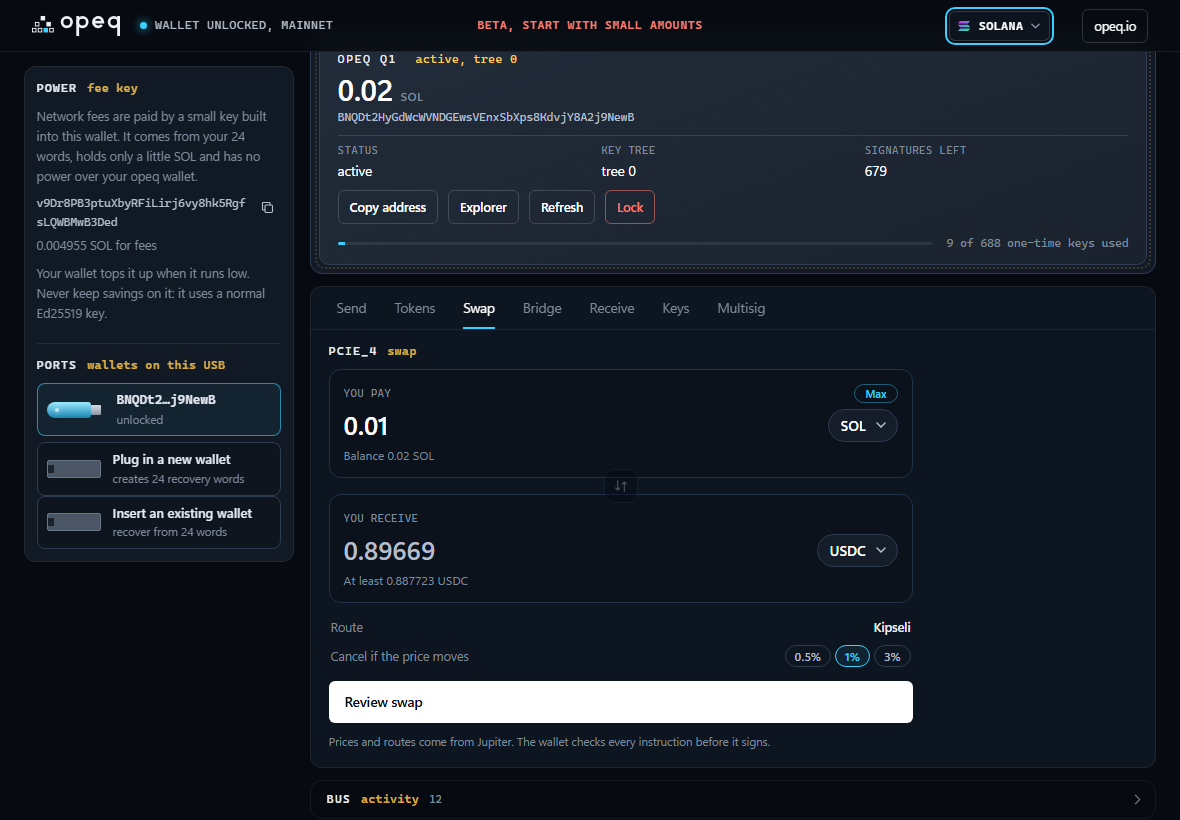
Open the Swap tab, pick what you pay and what you receive, and enter the amount. Prices and routes come from Jupiter. Choose how much the price may move before the swap cancels, press Review swap, read the window and confirm. The wallet checks every instruction before it signs.
EVM networks
The same 24 words also open an OPEQ account on Ethereum, Base, Arbitrum and Robinhood Chain, with the same address on all four. Pick a network in the menu at the top right.
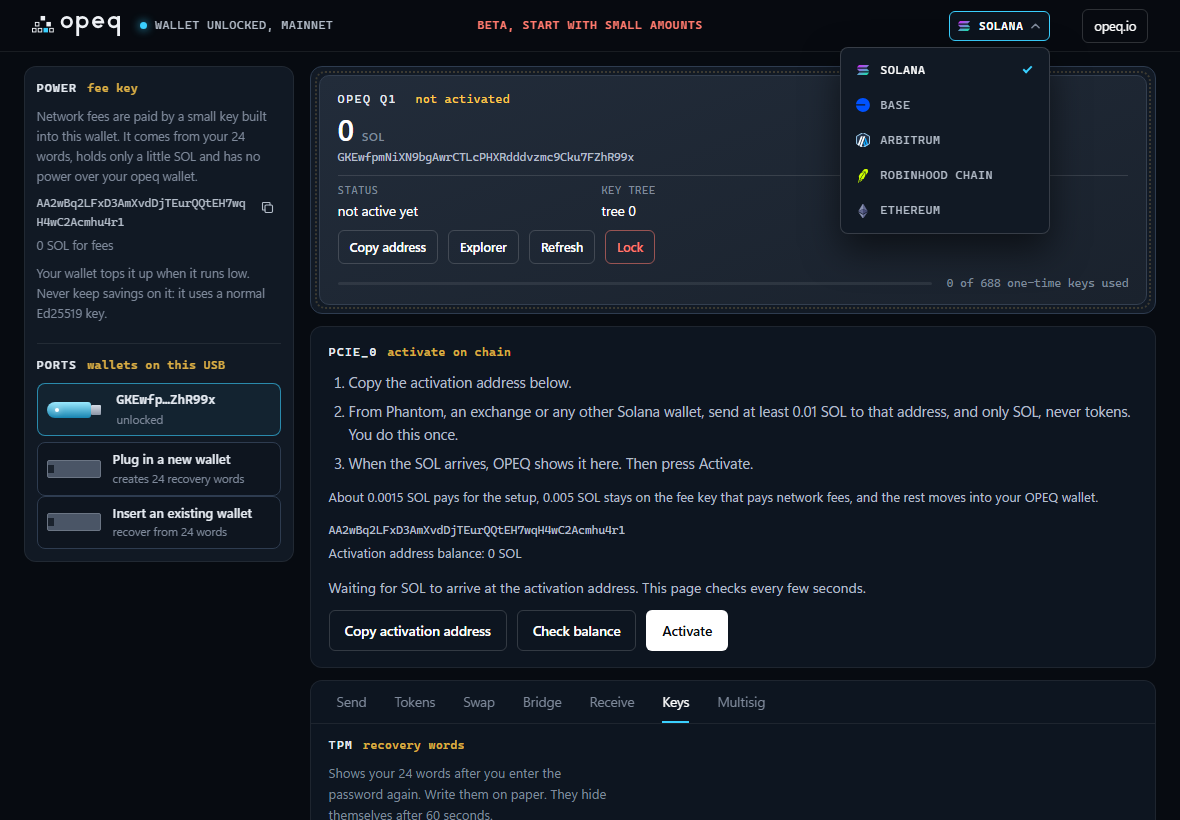
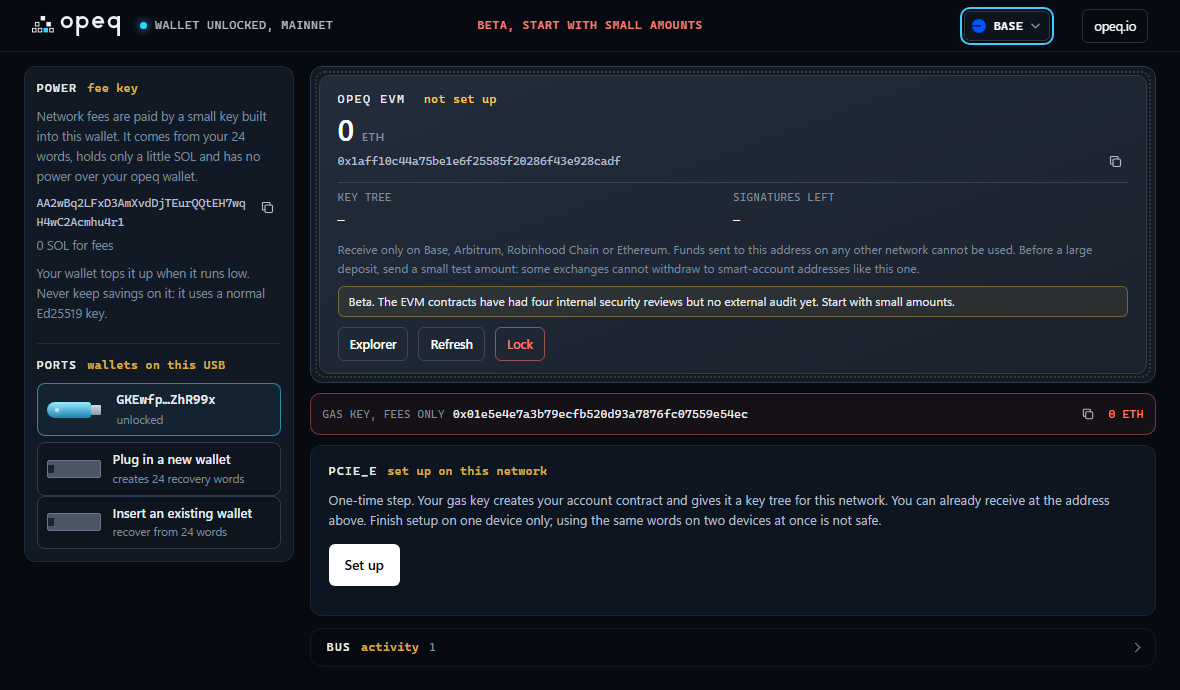
- Fund the gas key. Copy the gas key address (the red bar) and send it a little ETH on that network, for example 0.0005 ETH on Base. Like the fee key on Solana, it only pays gas.
- Press Set up. It takes up to three transactions, once per network.
- Receive at your account address (the big one at the top), only on these four networks. Before a large deposit, send a small test amount: some exchanges cannot withdraw to smart-account addresses.
Bridge
Move SOL, ETH and USDC between Solana and the EVM networks, always to your own OPEQ address on the other side. The account on the other side must exist first: activated on Solana, set up on EVM.
- On Solana, open the Bridge tab. On an EVM network, scroll to the Bridge card.
- Pick the network, the asset and the amount, and press Review bridge.
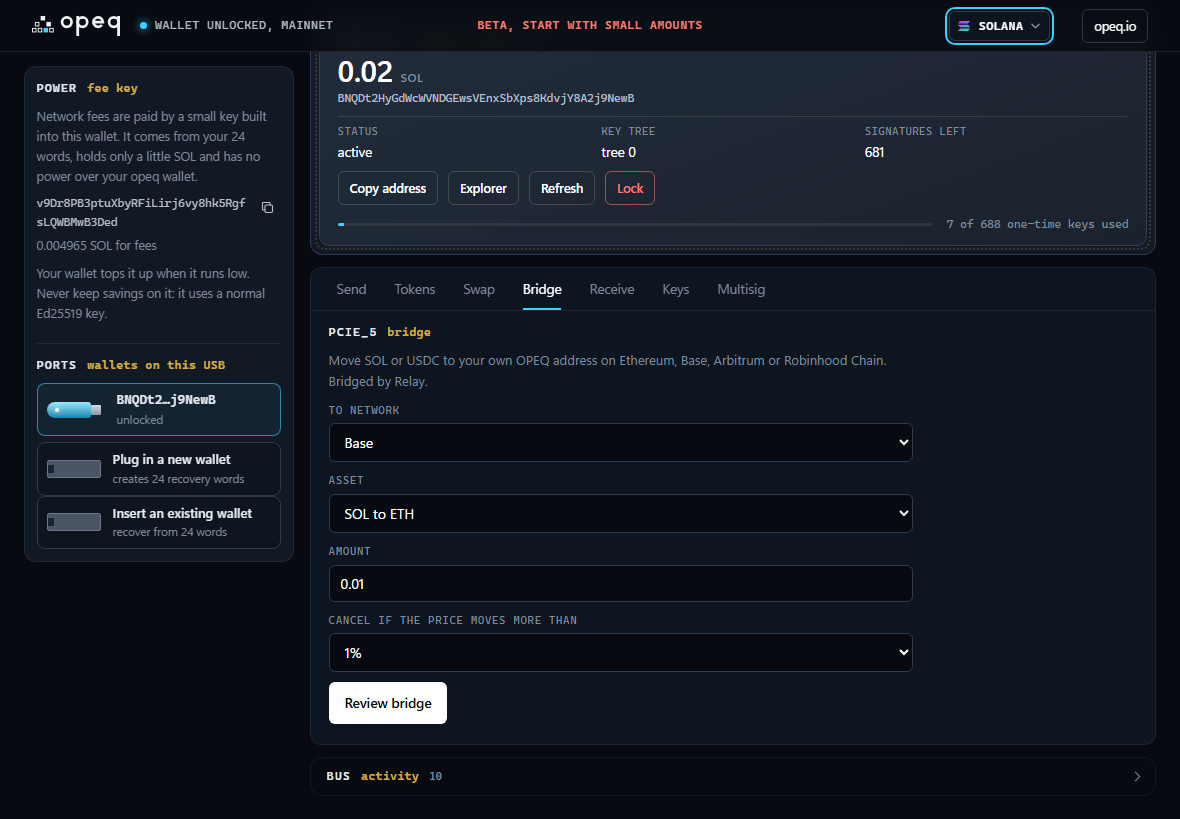
- Read the window: what you send, what you receive and the minimum, your own address on the other network, Relay's fee and the time. Then press Bridge.
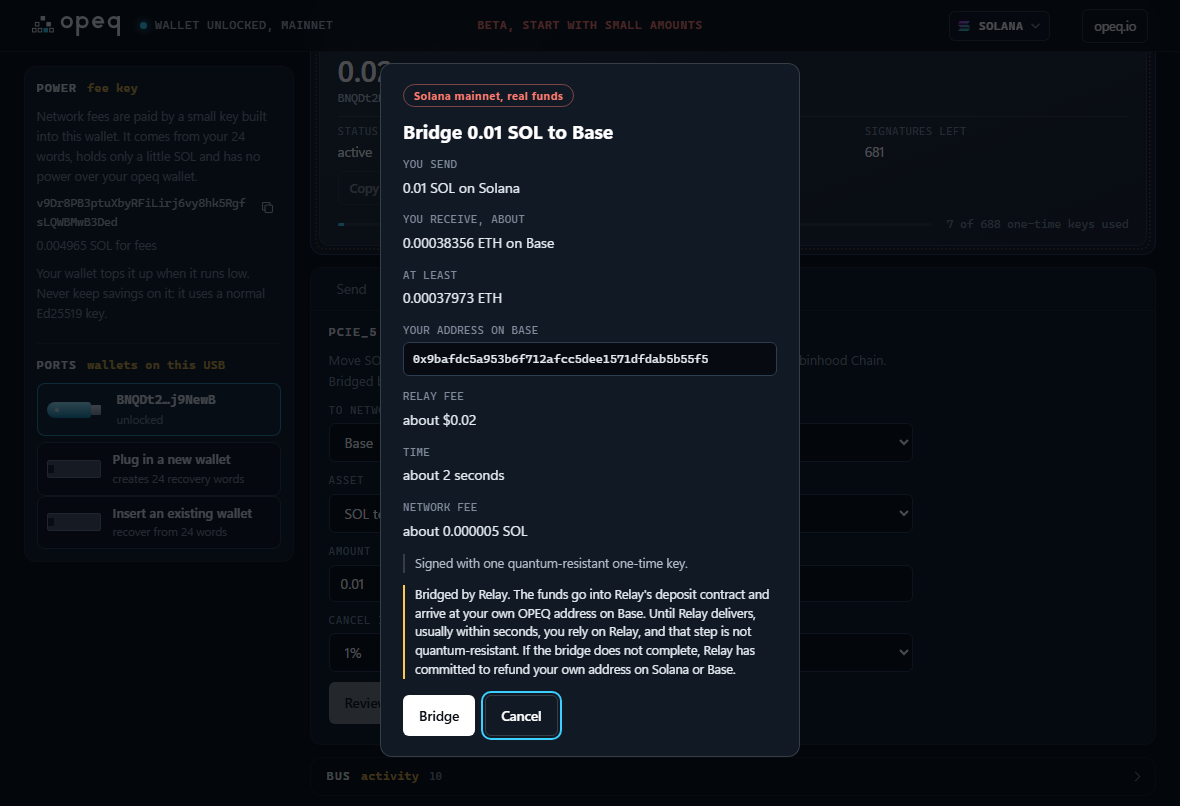
- Wait a few seconds. The wallet follows the bridge until it says Bridge done.
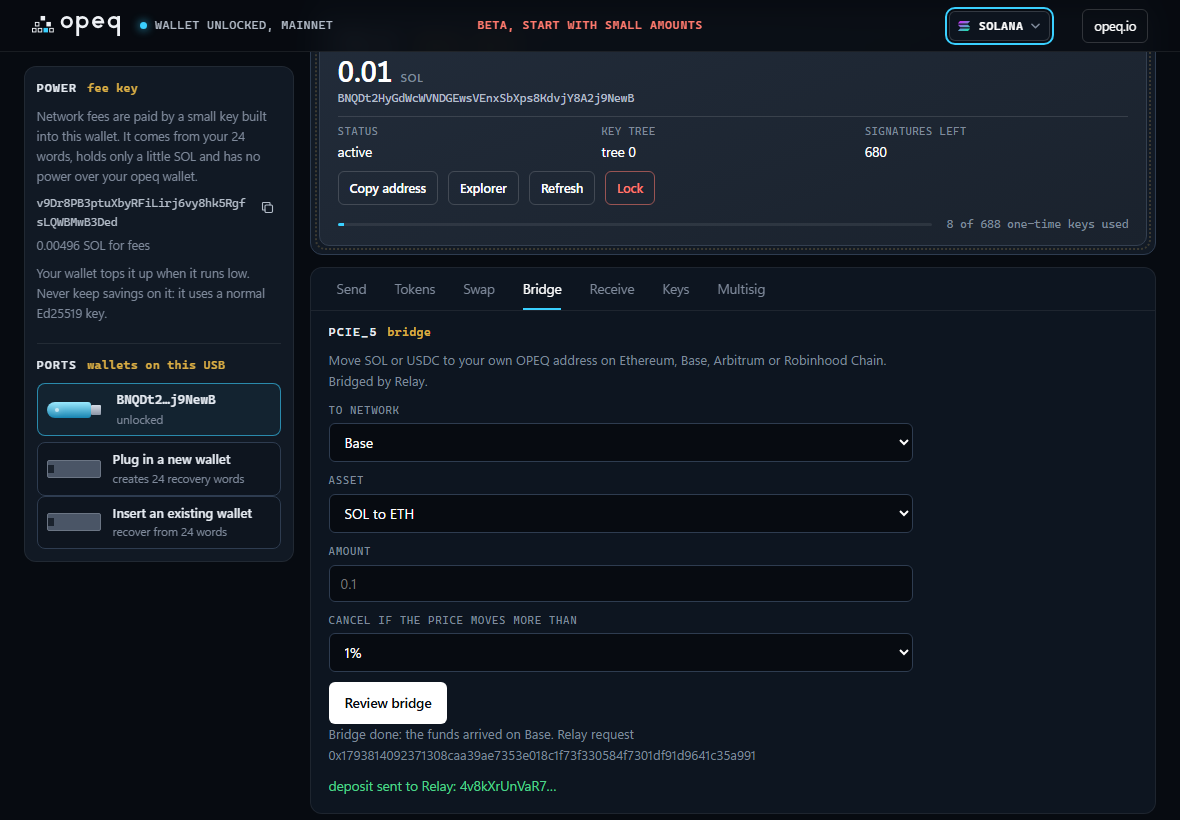
The bridge is run by Relay. Your deposit is signed with a quantum-resistant key; Relay's delivery on the other network is not, so you rely on Relay until it arrives. OPEQ takes no fee.
Multisig
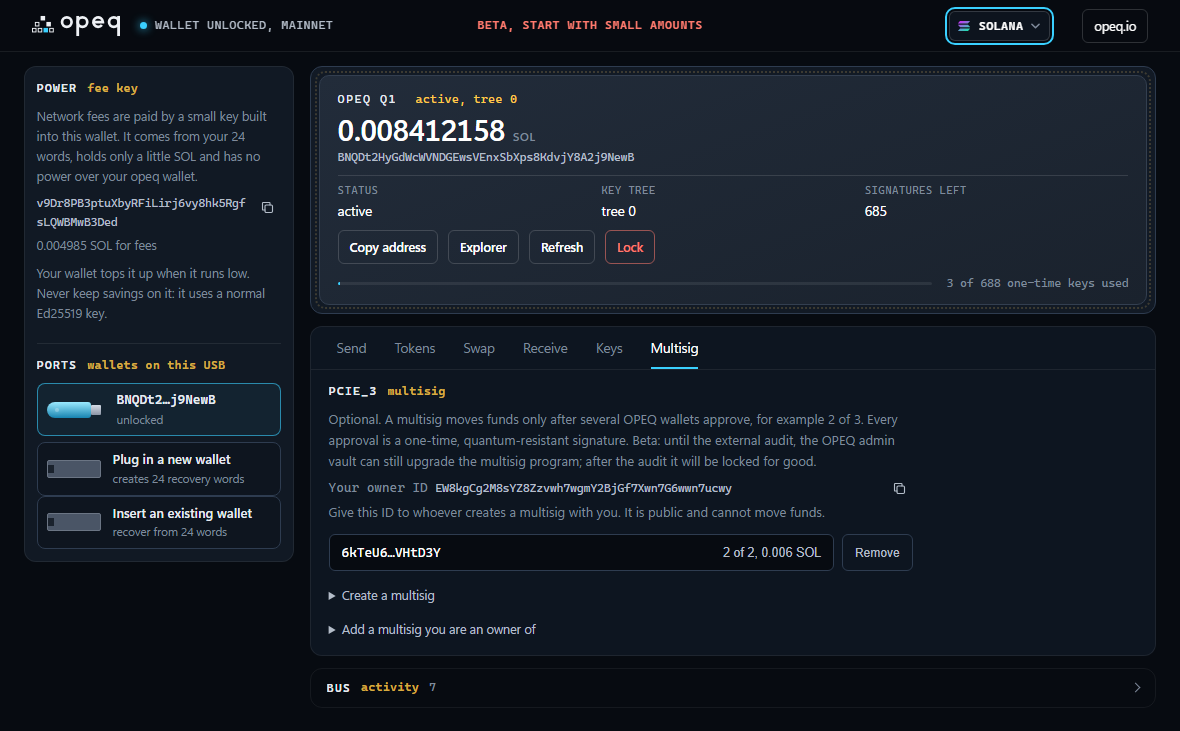
A shared vault that moves funds only after several OPEQ wallets approve, for example 2 of 3. Optional: your normal wallet works exactly as before. Open the Multisig tab.
- Share your owner ID. Each owner copies it from the Multisig tab. It is public, like an address, and cannot move funds.
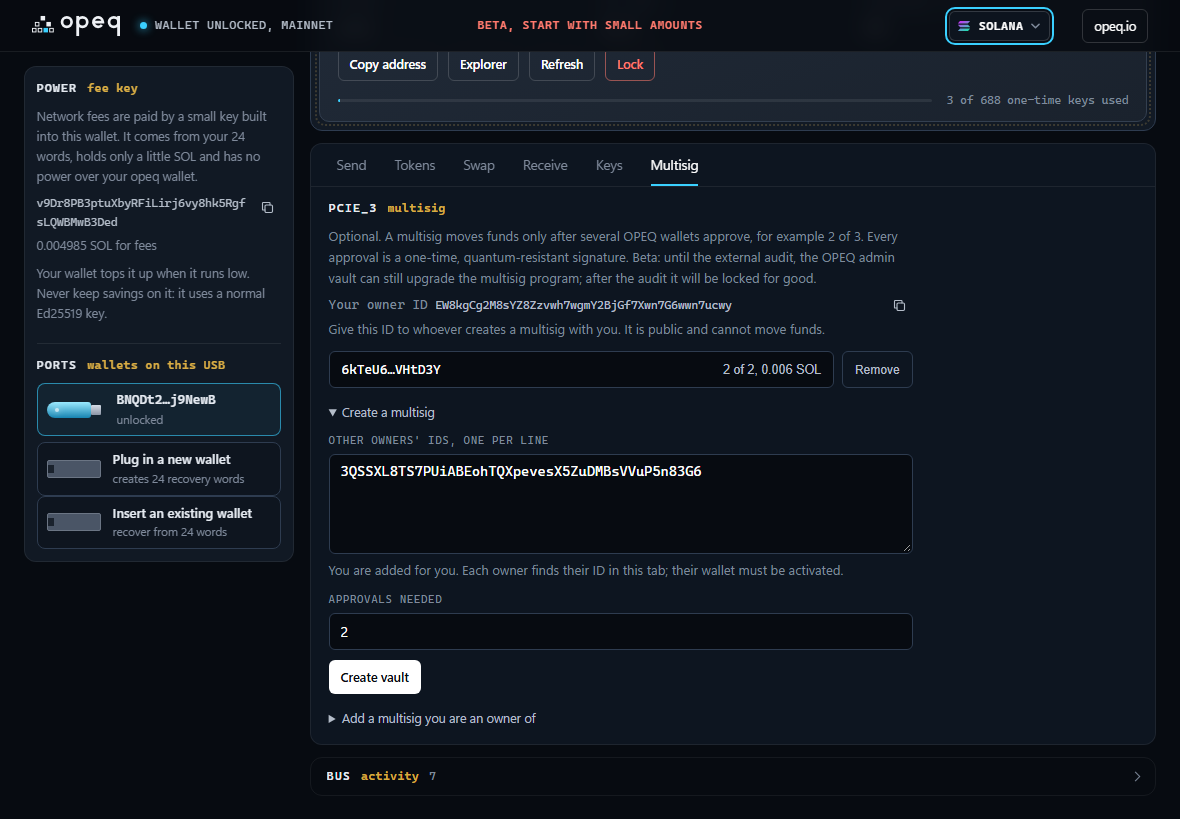
- Create. One owner pastes the other owners' IDs, sets how many approvals are needed and presses Create vault.
- Fund it. Send funds to the Deposit to address, never to the multisig ID. The other owners add the vault with Add a multisig you are an owner of.
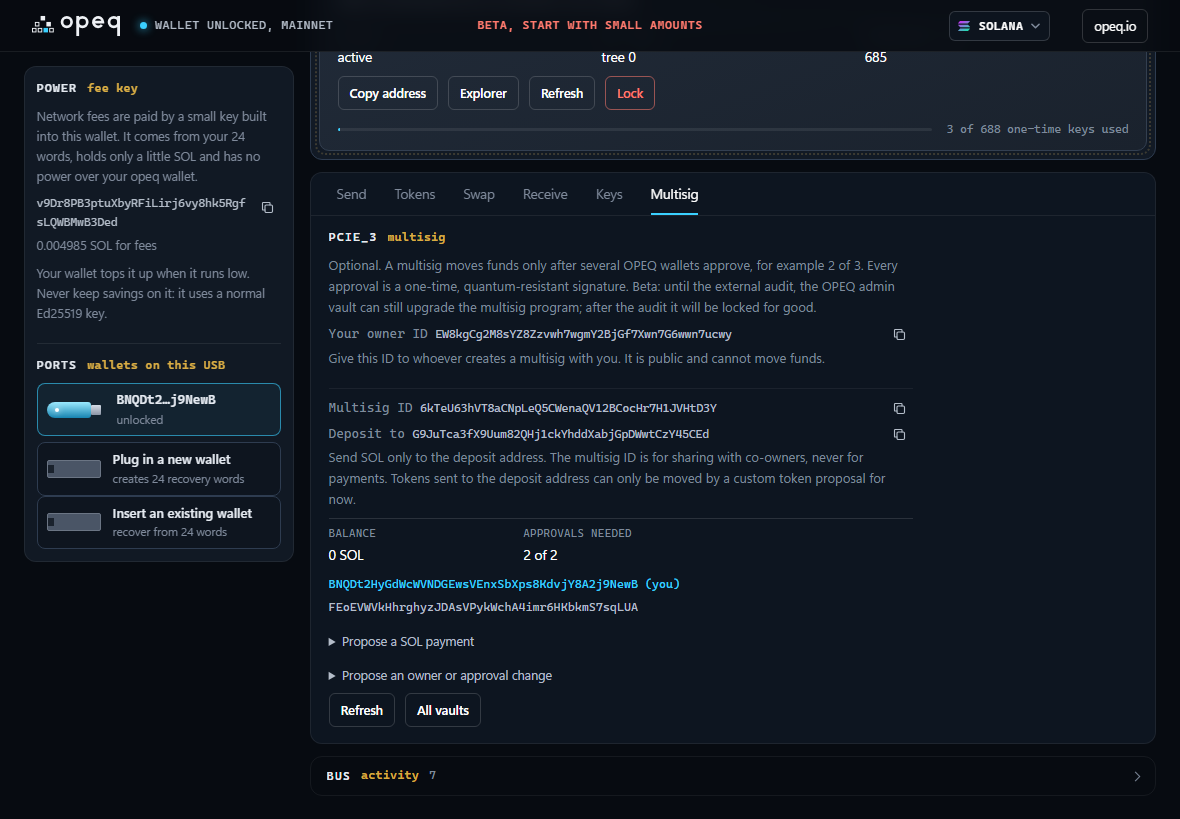
- Propose. Any owner proposes a payment. It already counts as their approval.
- Approve. The other owners see the full action in their wallet and press Approve.
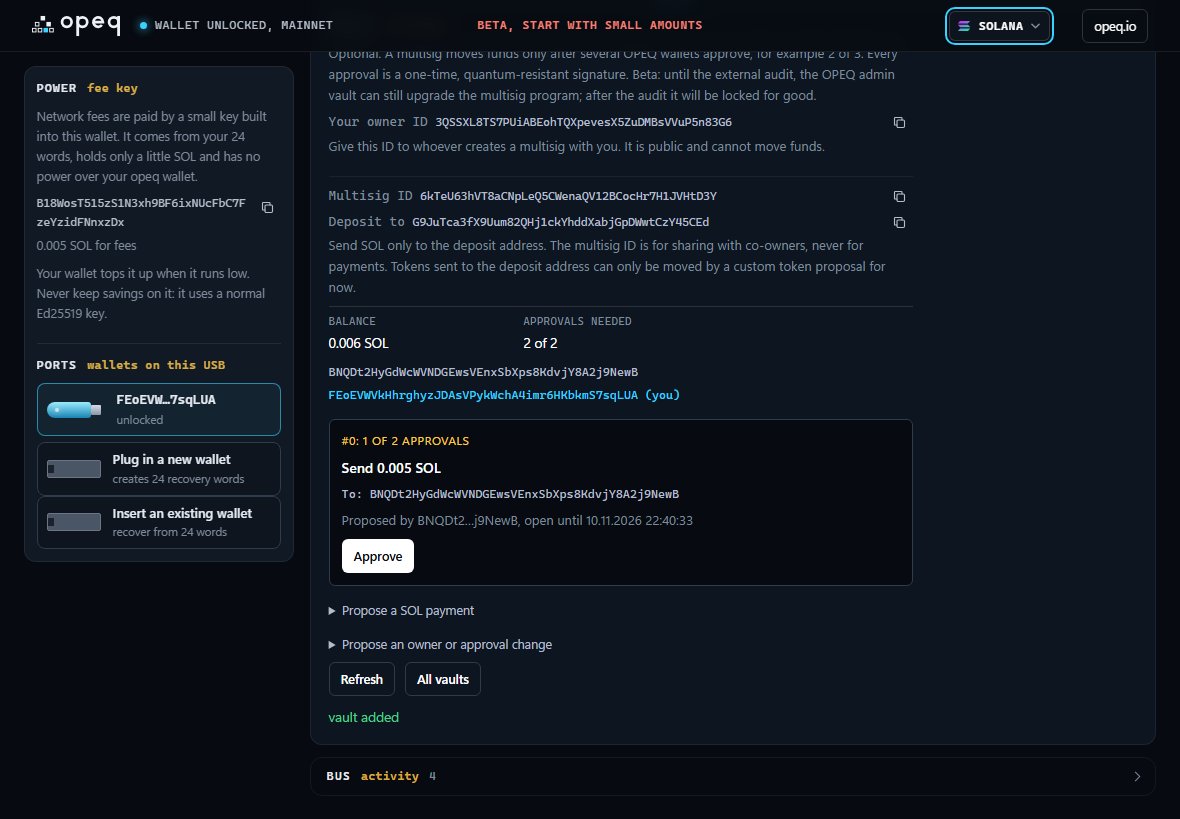
- Execute. When enough owners approved, any owner presses Execute and the vault pays.
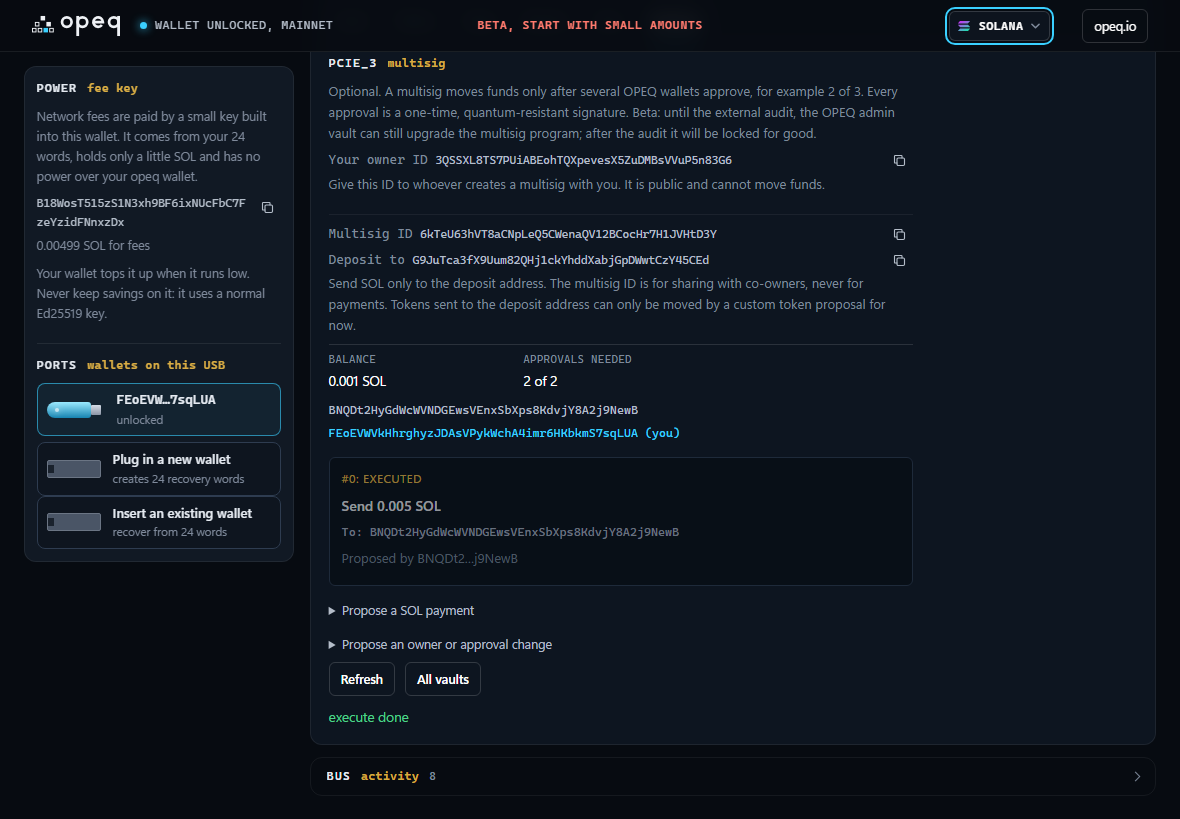
On EVM networks it works the same way in the Multisig card, with account addresses instead of owner IDs.
Words and recovery
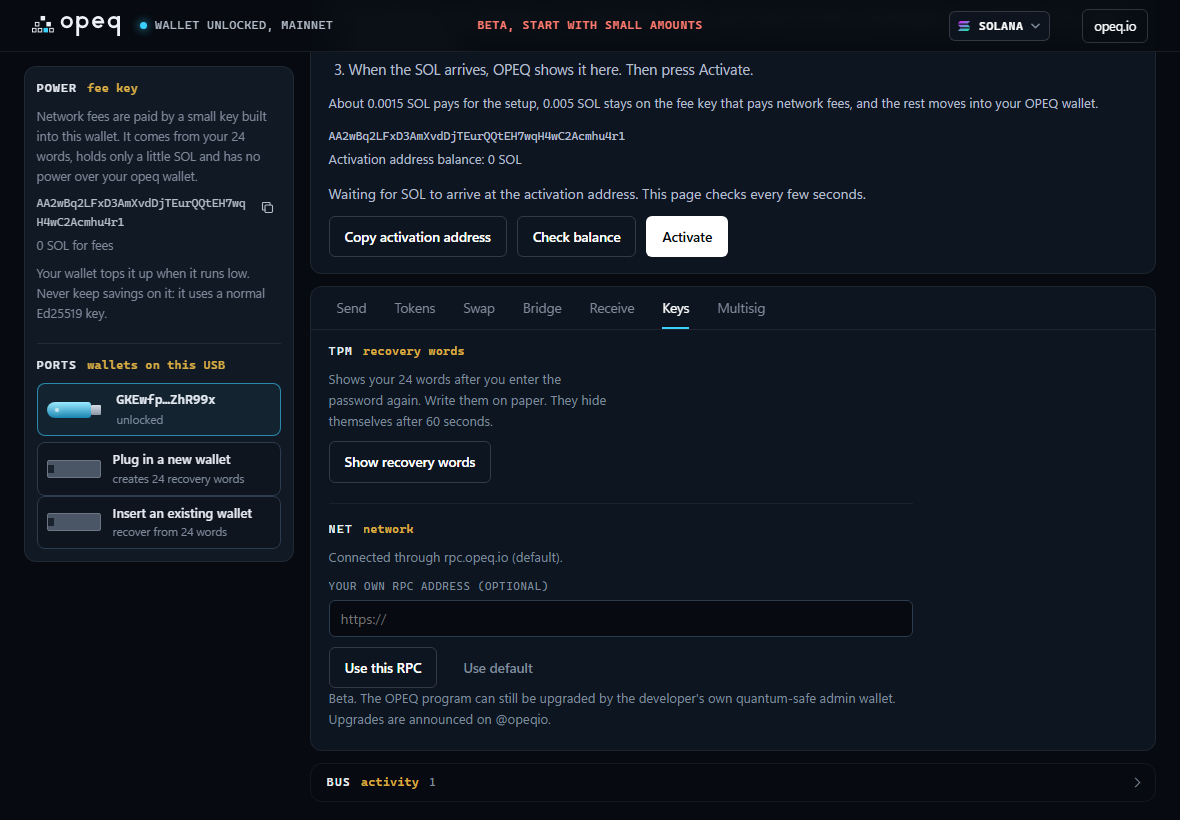
- See your words
- Keys tab, Show recovery words. It asks for your password and hides them again after 60 seconds.
- New computer
- Choose Insert an existing wallet, type the 24 words and pick a password. Then press Use on this device: from then on only this device signs, and any old copy stops.
- Forgot the password
- Recover from the 24 words with a new password. Without the words nobody can help, including OPEQ.
After 688 signatures
Every signature uses a fresh one-time key. One key tree holds 688 of them on Solana (960 on EVM). The wallet shows how many are left. When they run low, press Rekey now in the Keys tab: the wallet moves to a new tree made from the same words. Your address, balances and words stay the same.
Safety rules
- Type your 24 words only into OPEQ itself, the Chrome extension or the USB app. Never into a website, never into a chat, never for "support". OPEQ will never ask for them.
- No website can connect to OPEQ. If a site says it needs to connect to your OPEQ wallet, it is a scam.
- Read every confirmation window. It shows exactly what will happen before anything is signed.
- Keep savings in the OPEQ wallet, not on the fee key or gas key.
- Use one device at a time. Don't sign from two devices with the same words at once.
- Start with small amounts. OPEQ is in beta.
If something looks wrong
"The fee key is empty"
The fee key needs a little SOL to pay fees. Normally your wallet tops it up by itself; if the wallet itself is also low, send about 0.01 SOL to the fee key address in the left panel.
I sent funds to the fee key by mistake
They are not lost. When the fee key holds more than about 0.03 SOL, the wallet shows a Move to wallet button that moves the extra into your OPEQ wallet.
"The gas key needs about … ETH"
On EVM networks, send a little ETH on that network to the gas key address (the red bar). It only pays gas.
"This copy of the wallet is not signing yet"
Your words are active in another browser or device. Press Use on this device to make this copy the only one that signs; the other copy stops. If you never entered your words anywhere else, someone else has them: create a new wallet now and move everything to it.
The USB app says "OPEQ stopped"
The files on the stick don't match the official release. Don't type your password or words. Delete everything in OPEQ-USB except the data folder, copy a fresh OPEQ-USB from the official zip, and put the data folder back.
More details
The docs explain how everything works, with addresses and the full specification.